 TrustATrader
Fitting window shutters might look tricky, but it’s actually quite straightforward when you know what you’re doing. Whether you’re planning to do it yourself or just want to understand what’s involved, this guide breaks down the whole process into simple steps.
What You’ll Need
Before you start, make sure you’ve got the basics:
Tools: Drill, spirit level, measuring tape, screwdriver, stud finder, safety glasses Materials: Shutters, mounting brackets, screws, wall plugs
The good news is that most shutters come with everything you need in the box, so you won’t be hunting around for specialist parts.
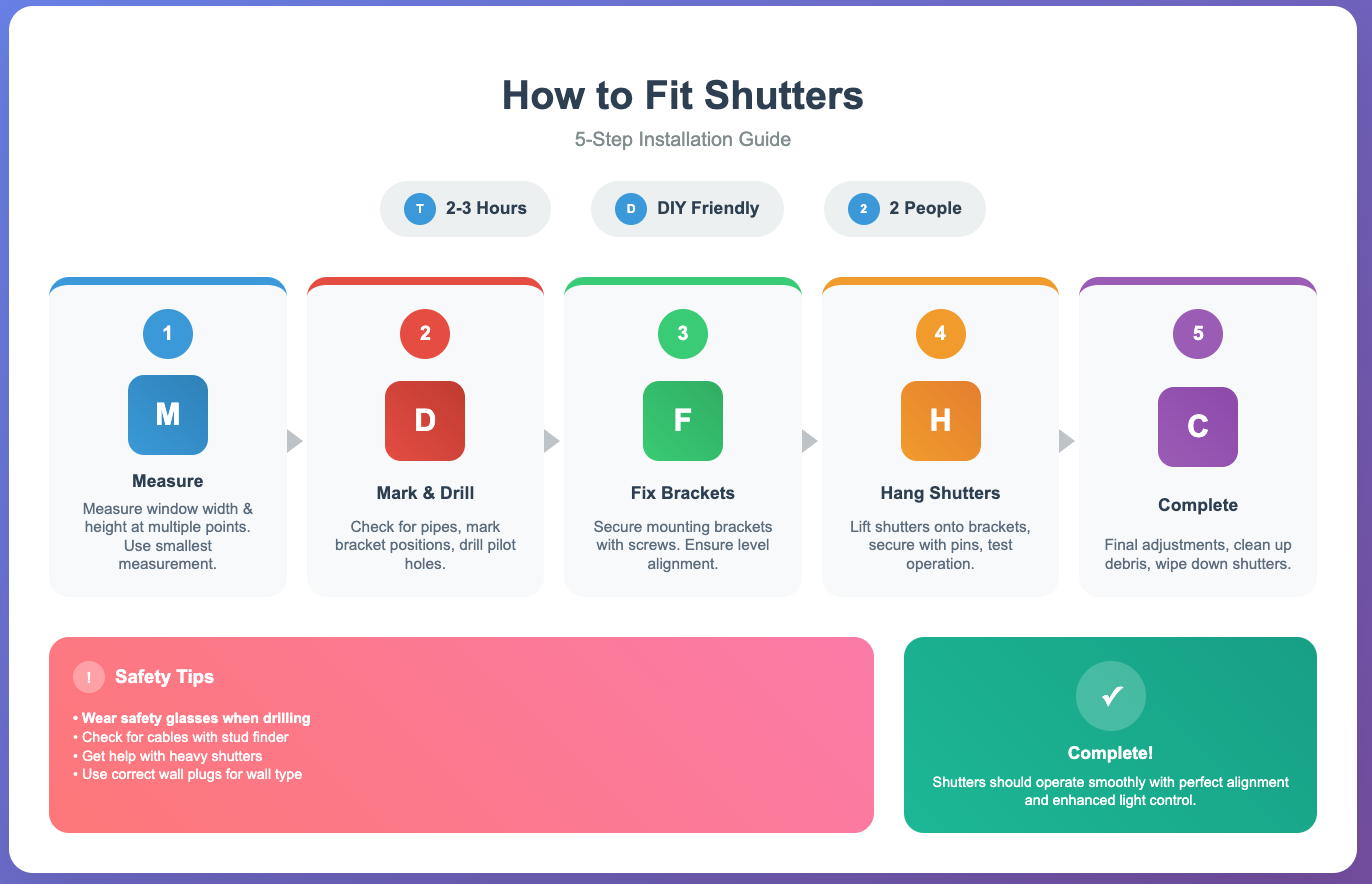
Step 1: Measure Your Window
This is the most important step – get this wrong and nothing else will work properly.
Measure the window width at the top, middle, and bottom. Windows aren’t always perfectly square, so use the smallest measurement to make sure your shutters will actually fit. Do the same thing for the height, measuring left, centre, and right.
If you’re fitting the shutters outside the window recess, measure the area you want to cover. Most people extend about 50-75mm beyond the window frame on each side for better light control.
Step 2: Check What’s Behind the Wall
Before you start drilling holes, you need to check what’s lurking behind the wall. Use a stud finder to locate any pipes, cables, or anything else that you definitely don’t want to drill into.
Keep an eye out for light switches, plug sockets, or radiators that might get in the way when you open and close the shutters. It’s much better to spot these problems now than halfway through the job.
Step 3: Mark Where the Brackets Go and Drill
Hold your first bracket in position and mark the screw holes with a pencil. Use your spirit level to make sure it’s perfectly horizontal – even a tiny tilt will cause headaches later when you try to hang the shutters.
Put on your safety glasses and drill pilot holes. For brick or concrete walls, use a masonry bit that’s slightly smaller than your wall plugs. For wooden window frames, use a wood bit that’s slightly smaller than your screws.
Clean out any dust from the holes before you put the wall plugs in.
Step 4: Fix the Brackets
Push the wall plugs firmly into the holes – they should be snug but not forced. If a hole’s too big, use a larger wall plug or add some filler to tighten things up.
Screw the brackets into place using the screws that came with your shutters. Tighten them properly, but don’t go mad – you can damage the bracket or pull the wall plug through if you overtighten.
Check with your spirit level again that all the brackets are level and lined up with each other.
Step 5: Hang and Test Your Shutters
This is usually a two-person job, especially if you’ve got larger shutters. Carefully lift the shutters into position and line up the hinges with the brackets you’ve just fitted.
Most shutters either slot into the brackets or use removable pins to hold them in place. Make sure you understand how your particular system works before you start.
Once they’re hung, open and close the shutters a few times to check everything works smoothly. They should move freely without sticking or needing too much force. Test any tilt mechanisms or catches to make sure they work properly.
If something’s not quite right, you can usually make small adjustments by loosening the brackets slightly and repositioning them.
Final Touches and Clean Up
Once everything’s working properly, tighten up any screws that might have worked loose during testing. Give the shutters a wipe down to remove fingerprints and any dust from the installation.
Clean up any debris from drilling and vacuum around the window area. If you’ve made any small marks on the wall, you can fill them with a bit of filler and touch up the paint once it’s dry.
Common Problems and Solutions
Shutters won’t close properly: Usually means the brackets aren’t quite level. Loosen them slightly and adjust the position.
Gaps between panels: Check that all brackets are properly aligned and at the same height.
Stiff operation: A drop of light oil on the hinge points usually sorts this out.
Shutters rubbing against the frame: You might need to adjust the bracket position slightly or check your measurements.
Should You Do It Yourself?
Fitting shutters is definitely a job you can tackle yourself if you’re comfortable with basic DIY. You’ll need to be accurate with measuring and confident about drilling into walls, but it’s not rocket science.
That said, if you’ve got particularly awkward windows, period features, or you’re not sure what’s behind your walls, it might be worth getting a professional in. They’ll have dealt with all sorts of tricky situations and can usually work around problems that might stump a DIYer.
When fitted properly, shutters should open and close smoothly, look perfectly aligned, and give you excellent control over light and privacy. They’re also a great way to add value to your home and can last for decades with minimal maintenance. The average UK house price has risen by 6.4% annually, taking the average property value to £271,000, making home improvements that genuinely add value increasingly important for homeowners.
The key to success is taking your time with the measuring and marking stages. Rush these, and you’ll have problems later. Get them right, and the rest of the job flows quite naturally.
Ready for Professional Shutters?
While DIY installation can be rewarding, there’s something to be said for having professionals handle the job from start to finish. Expert fitters bring years of experience, the right tools, and can handle any unexpected challenges that crop up during installation.
If you’re considering shutters for your home but want the peace of mind that comes with professional installation, Best Blinds offers expert fitting services with high-quality shutters tailored to your exact requirements.
Ready to transform your windows with professionally fitted shutters? Get your free, no-obligation quote from Best Blinds and discover how beautiful, custom shutters can enhance your home.